
Let the Light Shine In: How to Buff Your Hazy Headlights
You know those people on the road who seem to have their brights on, but they just have really clean and powerful headlights? Don’t you want to be like them?
It’s not impossible, even if you have an older model car. Most of the time hazy headlights just need a good cleaning. Want to know what that consists of?
Learn how to polish headlights and restore their shine in the guide below.
Step One: For All Methods
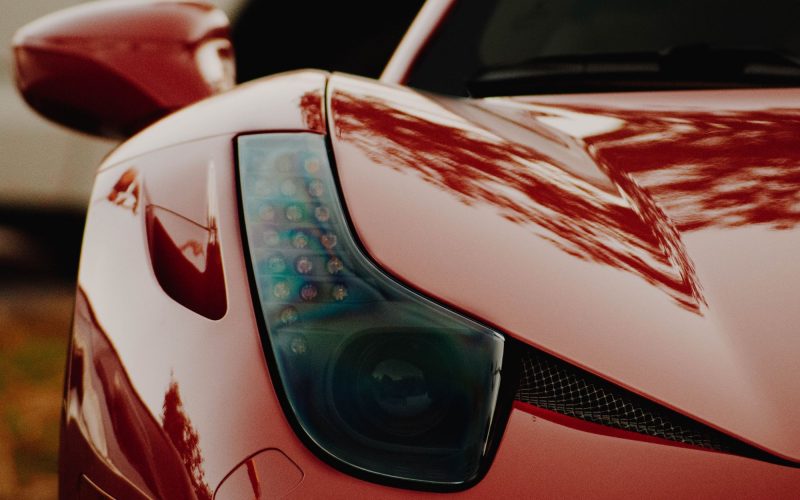
Before you try any of the tips below, you need to start with a clean surface. This applies when you’re sanding your headlights, to when you’re using a professional kit. You don’t want to buff the dirt and bug guts into the plastic!
The best thing to clean your headlights with, to prepare them for buffing? Dish soap! It’s gentle, so it won’t hurt the car’s finish if it drips down onto the paint.
The grease fighting properties of the dish soap help remove things like dead bugs and caked on bird poop. Warm water with some dish soap and a soft sponge are all you need.
Method 1: How to Polish Headlights With Condensation
If you look at your headlights close up, do you see small beads of moisture on the inside of the plastic casing? Condensation can build up there from humid or rainy climates.
It fogs up your headlights, just like your body heat and moisture does when it’s cold outside.
The way to treat this? Take off your headlight casings. You want to read your owners manual before you do this since each car’s plastic cover comes off differently.
Take a cloth and clean the plastic, inside and out, with one of the following methods. While you have the cap off, take a dry, soft cloth to the bulb and the plastic around it to soak up any moisture there.
Apply some anti-fog or rain resistant windshield spray to the inside of the casing and buff it in. Then re-attach your headlight and you’re good to go!
Method 2: Fixing Yellowed Headlight Plastic
When you look at your headlights, does it seem like the plastic clarity is the problem? Does the plastic have a yellow tinge?
Then you need to take off a layer of plastic to reveal the clear layers underneath. Is this crazy? Not as much of it sounds.
Think of it like exfoliating your skin. Once you get flaky dead skin off, the skin underneath looks new again.
For this method, you’re going to need some high grit sandpaper. We’re talking 1000 grit or higher. You’ll also need a medium grit, like six or eight hundred.
When you buy the sandpaper, make sure it’s able to be used wet, since you’ll be adding water to the process.
When you’re ready to buff, get a bowl of water and clean your headlights with dish soap. When the soap is gone, take your mid-grade sandpaper and wet it.
Rub it on the headlight, inconsistent motions. Keep the plastic wet, don’t let it dry out against the plastic. Rinse your sandpaper in the water and keep going. Once you’ve gone over the whole light, wipe the headlight with a cloth.
If you’re happy with how it looks, get out your super-fine grade sandpaper. Wet it and rub in small, circular motions. This should be enough to sand out scratches from using the mid-grade paper.
Wipe it with a soft cloth when you’re done – then seal it. You don’t want to go out on the road with a new layer of “skin” unprotected. Add a specialized wax (found at car stores) to seal the new, clean layer from the elements.
Method 3: DIY With Toothpaste
Yes, the number one household item people use to clean their headlights is what cleans your pearly whites. Toothpaste has a very slight abrasive nature, which buffs out the fog from your plastic.
It isn’t as all-powerful as using sandpaper, so use this method when headlights aren’t opaque.
To use this method, find a toothpaste that has “tartar control” most store-bought versions have it.
Then, take a soft cloth, like the type you dust with and put the toothpaste on the fabric. With toothpaste on the cloth, open and close it a few times so the toothpaste distributes throughout the cloth.
Then, with toothpaste side out, rub in small firm circular motions. This should help remove the oxidation effect from your headlight.
Keep rubbing in small but firm circles until you’ve covered the whole surface. Then wash it off with water and a soft sponge. Let it air dry and check the results.
If you’re happy with it, you’re done! If that didn’t do the trick, you may need a professional who can perform this service.
Method #4: DIY With Bug Spray
Yes – we said bug spray. As crazy as it sounds, there’s a chemical in bug spray that can bring your bright lights back.
The method of applying is the same as using toothpaste – except you’ll want to spray the bug spray onto the plastic. When you spray it, hold a cloth underneath to catch the drips.
Rub it in small, circular motions and see if that helps. It’s supposed to treat some of the UV damage. We can’t say if it’ll repel bug splatters – but if it does, let us know!
Cleaning Your Headlights
If you don’t want to sand your headlights or spray OFF on them, you can always buy a restoration kit. You can find these at auto stores and they’ll have instructions on how to polish headlights.
Whatever you end up doing – stay away from glass cleaners. They have ammonia in them, which can yellow plastic, not clean it.
Want more advice on DIY repairs? Check out this article.