

Infiniti Chrome Pillar Upgrade Kit
I believe in keeping a car in factory original condition. However, the InfinitI chrome pillar upgrade kit is a commonly installed dealer option. Since I purchased my M37 used I didn’t have the opportunity to select the dress-up accessory before delivery.
This turned out to be a good thing and in this short article I’ll explain why. I’ll also provide some tips for the installation of the chrome pillar upgrade kit and talk about what can go wrong. Finally I’ll show you some before and after pictures of my Infiniti M37x. This way you can see if the look is something you’re interested in for your own car.
First Experience with a Chrome Pillar Upgrade Kit
As I mentioned I usually do not prescribe to applying aftermarket accessories to my factory automobile. However, in 2009 I purchased a Cadillac SRX. At first the lack of chrome seemed charming and modern looking.
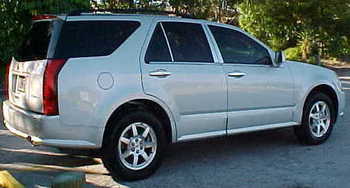
On a visit to the dealer for a Cadillac recall I wandered over to the parts department while waiting. There in the showcase I saw a chrome pillar and door handle upgrade kit. They showed some before-and-after pictures and I said to myself, I have to get this.
As you might expect purchasing a chrome dress-up kit from a dealership parts department is the most expensive way to obtain these parts. But the high price tag came with instant gratification. Although installing the kit for the first time was a little daunting it went well and looked brand-new the day I traded in the Cadillac SRX.
Infiniti Chrome Pillar Upgrade Appearance
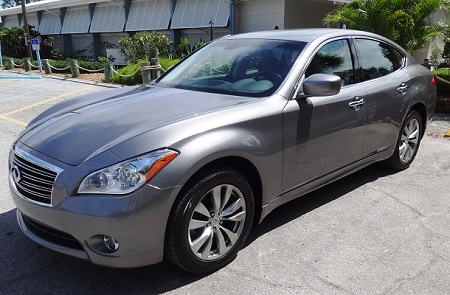
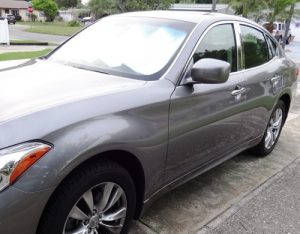
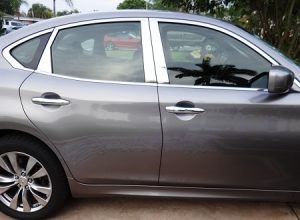
I posted some before and after pictures of my Infiniti M 37 on Facebook and asked my 600 friends for some feedback. The group of real friends was split right down the middle at 50 percent for and half against. This surprised me, because I thought it would be a slam-dunk winner.
I really liked the look. The negative feedback said it was a little on the gaudy side or in other words, too much bling. In fact, someone asked me if the dress-up kit came with a gold tooth.
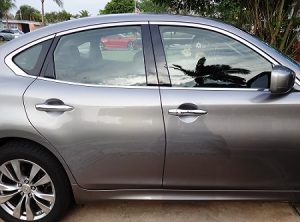
The reason I like the look is because the Infiniti cars already come with the chrome trim completely surrounding the side glass. When I installed the chrome pillar upgrade kit over the black finish it seemed to tie it all together in my opinion. Whether or not you decide to go for it on your own automobile will certainly be a matter of taste.
High Quality Chrome Pillar Upgrade Kits
Before I pulled the trigger on buying an Infiniti chrome pillar upgrade kit I called the dealer for some details. They sold an eight piece kit for $199. I thought this was a good price, because I paid twice that at the Cadillac dealer the first time I installed one.
I asked the counterman if the parts were genuine Infiniti. He said they were supplied from a reputable aftermarket company. When I went online to do my own research I found many aftermarket companies supplying these types of accessories. I even found more than one that manufactured the parts here in the United States.
More importantly, all of the suppliers came in at around the $60-$85 range including shipping, handling and tax. I decided to play it on the safe side and purchase it through Amazon, because of their liberal return policy. I was completely satisfied with the quality of the merchandise. The stainless steel, chrome trim pieces were sized correctly.
This is probably the most important part about maintaining a factory installed look. I also want to mention that shipping is really important for these parts. If a chrome piece of trim gets even the smallest ding, it becomes extremely visible. Therefore, Bubble Wrap and reinforced packaging are a necessity when shipping these accessories.
Tips for Installing Chrome Pillar Trim
It’s not that the installation of these chrome pillar trim pieces is difficult it’s more about only getting one shot at doing it right. The 3M professional trim adhesive that is on the back side of the individual parts is really strong stuff. And it’s designed to last a lifetime.
If you put the trim down in the wrong place you will not be able to peel it back up and re-position it without damaging either the car or the trim. Since I have done this once before I learned some tricks to help increase the chances of doing it right the first time.
No. 1 is to follow the instructions about cleaning the surface. The kit I used recommended cleaning the black painted surfaces with alcohol. The next tip is laying the pieces out on the left side and the right side near the work area. It’s nice to complete the operation in one smooth swoop without having to walk away.
The next thing I recommend doing several times is dry fitting the chrome pillar pieces. When I say dry fit I’m talking about leaving the protective film over the 3M adhesive. Notice the spacing and any gaps to the top, bottom, left and right. If you’re lucky and the parts are precision cut the precise fit will help you guide them into place.
However, on some cars the shape of the trim allows for some movement and placement errors. After you feel confident with the location and are happy with the look, it’s time to peel the tape off the industrial-strength adhesive. Since you cannot move the trim after the first stick, use your fingertips of all 10 fingers between the trim and the mounting surface.
When you get the parts in the right place you can start backing your fingertips away and allow the chrome trim to settle into place. If you start at the bottom and leave your fingertips in place at the top you might have the ability to make some minor final adjustments.
After the part is completely adhered to the factory pillar molding, apply some pressure to work out any air bubbles. In a perfect world you would use a trim installation roller to perform this operation. However, you can use a microfiber towel and apply pressure while buffing the trim surface.
If you don’t have steady hands or you have never done the operation before consult a professional trim or body shop. They usually have reasonable prices for installation. They’ll also have a better chance of success since they install these chrome pillar dress-up kits all the time.