
How to Do an Oil Change for Your Car
An average oil change with synthetic oil costs from $45-$75, depending on the oil quality.
Buying your own oil is significantly cheaper than that. If you feel comfortable going under your car and have access to a car jack, you can change it yourself.
Still not sure? Learn how to do an oil change below!
How to Do an Oil Change
You’ll need a few things to do your own oil change. Make sure you have everything you on the list below before you start.
- Gloves
- New oil
- Oil Filter
- Tools
- Car jack
- Drain Pan
Choose Your Oil
Every kind of car has a different perfect oil. Some cars need high grade-oils to begin with, others ask for special upgrades.
For example, cars with more than 85,000 miles love high-mileage specialized oil.
In hot climates, cars prefer heavier oil and the opposite in cold.
The best way to find your oil type is to look in your owners manual or on the oil cap itself. The oil type will be on the oil valve in yellow or orange text.
Jack Up Your Car
To change your own oil, you need access to a mechanics bay or more realistically, a floor jack and supports.
Once you have the jack and supports in place, triple check that everything’s sturdy.
Go under the car with eye protection and gloves you don’t mind getting dirty. Oil is messy!
Find the Oil Drain Plug
Your car has something called an engine oil pan, where dirty oil collects. It’s on the bottom part of the car and looks like what it sounds – a metal pan.
Once you locate the oil pan, find the oil drain plug. It’ll be on the lowest part of the pan, to aid in draining.
Once you’ve found the pan, make sure you have something it can drain into under it. Those large, aluminum, turkey roasting pans are cheap and work well.
Remove the Plug
Then, with the drain pan in place, start to loosen the drain plug. You’ll need a wrench or socket, usually in the 13-16mm range.
Be careful to find the perfect fit from your toolset, the last thing you want is to round the plug head. Using your wrench, turn the plug counter-clockwise and put some strength into it.
As it starts to loosen, oil will drip and once the plug is out you’ll want your hands out of the way.
Let the oil drain until it stops dripping, then wipe the opening with a shop towel. Check if your drain plug has a washer attached, those need replacing with your oil change.
Reinstall your drain plug the opposite way you took it out and make sure it’s nice and tight. To prevent cross threading, experts recommend doing the first few rotations by hand.
Remove the Oil Filter Housing
Above and to the side of your drain pan, you’ll see your oil filter housing.
Depending on the type of oil filter housing your car has, you may need a special or size 22 socket wrench. You can find out if you’ll need this step by googling it or if you buy the replacement filter in person.
Rotate the filter or housing with gloves on, counterclockwise. As you untwist, oil will leak from the filter – so move your draining pan over.
Lift the oil filter out by pulling up while twisting (unless yours has handles). Hold the part oil-side-down over your drain pan until most of the oil drips off.
Switch the Filters
Then, take the old filter out of the canister with a gloved hand. Before you throw the old one away, check to make sure the new one will fit.
They don’t have to be exact matches, but you can’t drive to get a new filter if it’s wrong without the old one.
Insert the new oil filter and press down firmly. Make sure the base of the filter is all the way into the canister.
If you have an O ring on your housing, take it off and install a new one. Use a shop towel to wipe off the housing before putting the new ring on.
Once you’ve done all that, it’s time to put the housing back into the car. Like the plug, start twisting by hand to make sure all the rotations grip correctly.
Grab your oil pan and wiggle your way out from under the car – stretch your back and take a deep breath. You’re more than halfway there!
Open the Hood
You’re now done with the under-the-car part of your oil change. Prop your hood up and get your car’s preferred oil and a funnel.
Get your manual and check the max quart amount your car takes. Do not exceed this amount! It could blow your car’s front or rear main seal.
Open the oil cap and use your dipstick to check the oil level. You shouldn’t see much to any since it’s time for a change (and you’ve drained it!).
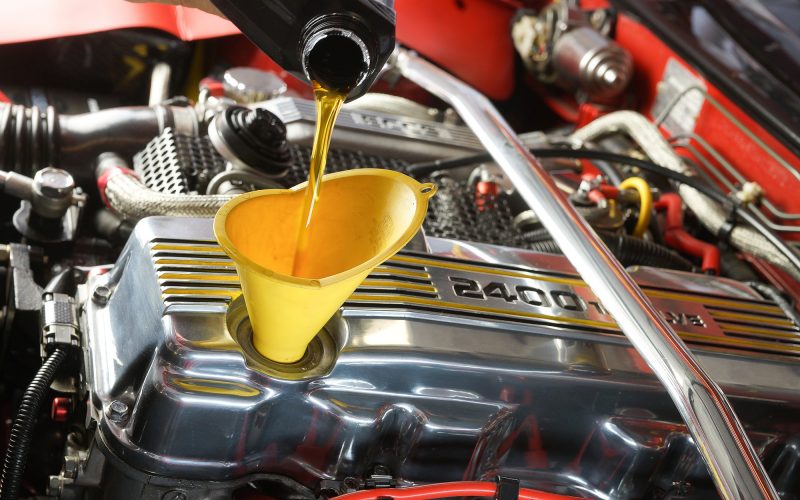
Pour The New Oil
Insert your funnel and put in about four quarts of oil, then clean the filter and oil cap off and start the car. Let it run for two minutes, so the new oil filter activates.
After the engine runs for two minutes, turn it off and go back under the hood. Pull out your oil dipstick and clean it off with your shop towel.
Then, slowly and steadily stick it back in and pull it out again. This will tell you how much new oil your car has.
If it’s not enough, repeat the filling step from earlier. The new, clean oil can be hard to see, so use a flashlight if needed.
Clean everything up and close the hood. You’re all done!
Cleaning Up
Now that you know how to do an oil change, you’re smarter than you were five minutes ago! We hope our guide helped walk you through your first self-done oil change.
Remember that you can’t discard car oil at your home, pour it into a bottle and take it to a car parts store. Pros like autodub say this is the most forgotten step.
If you found this helpful, be sure to check out all our other car advice. We work hard and collect the information so you don’t have to.
Learn “How to Fix a Flat Tire” or browse online repair manuals here.