
How to Remove a GM Door Panel
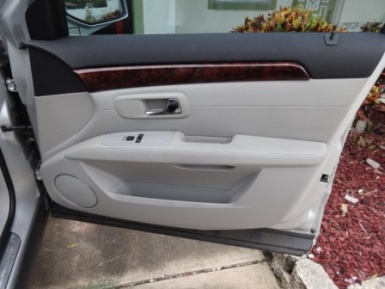
I had a door panel rattle on my 2009 Cadillac SRX that was driving me crazy. At first I turned up the radio like anybody else would. However, after I re-inflated my sporty low profile 255/60/17 factory issued tires to the recommended 32 PSI, The rattle got worse.
Here we’ll provide pictures and a video of how to get the door panel off and pinpoint the issue on the first-generation SRX. This procedure works on many GM cars. If you need interior trim removal tools or replacement clips and retainers, they’re listed below.
Hidden Screws on GM Door Panels
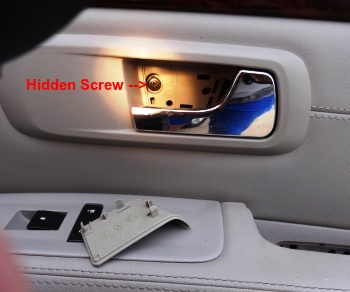
If you’ve ever tried to remove a General Motors door panel, you know there are a few hidden screws and secret techniques in getting it off. The first hidden screw is by the inside door release handle. Using a small or miniature flat blade screwdriver, carefully remove the screw cover. It just snaps into place. Underneath is a black number two Phillips head screw.
 The inside door handles stays with the panel. The release handle works by a remote cable set up. There is enough cable slack to get the panel off and set it aside. There are two more silver Phillips head screws holding the door trim panel in place. They’re by the grab handle used to close the doors.
Again, it’s time to use your small flat blade screwdriver to remove the plastic cover. Try to be careful, because these plastic bits are brittle and easy to break. Worst-case scenario they can be glued on after the operation is complete.
Removing the GM Door Panel
 After the three screws are removed, the only thing holding on the door trim panel is the General Motors idea of snap clips. I own a special tool to provide a little leverage, but I didn’t need to use it as the clips release easily with a tug. One special note to make on pulling the panel loose, is the triangle piece of trim over the side view mirror screws. This stays with the door panel.
There is one retainer and one guide holding the small plastic triangle over the side view mirror retainers. With the retention clips pulled loose the door panel itself hangs on a hook near the glass rubber molding. It’s time to pull up slightly on the door panel to clear the hook and the door lock knob. Now you can swing it out of the way to address needed repairs inside the door.
Repairs Inside the Door Panel
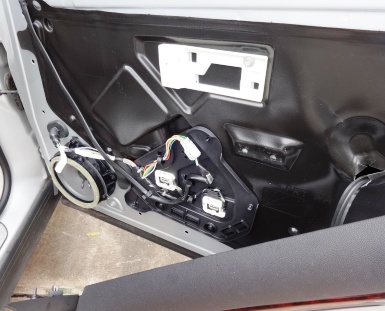
 I had to remove the door trim panel to solve a rattling issue. Unfortunately, this operation needs to be performed with a variety of other repairs. Door lock actuator issues and Power window problems with the lift motor and regulator require removal of the interior trim. Here I’m going to describe this annoying rattle repair. Every time you hit the slightest bump you could hear something shaking loose inside the passenger side door.
After removing the interior panel, I was surprised to find two plastic layers inside. One clips on top of the other. In my situation the upper retainer came loose and the two plastic panels would rattle against each other while driving. I was able to push on the panel and I heard it latch. For good measure I applied some silicone and let it harden before reinstalling the trim panel.
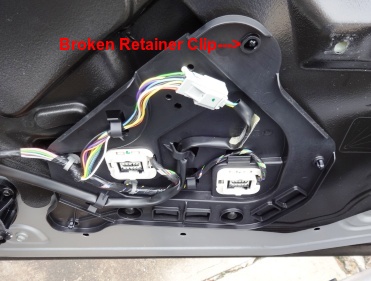
I also had a broken clip for the wood trim that decorates the top of the door panel. These plastic bits don’t hold up well in the Florida heat. I used some gorilla glue and gave it a chance to dry before I reassembled it. In closing, there is nothing more annoying than an interior rattle on a GM car.
Below I will provide a quick video that I shot and posted on YouTube to help tie up any of the loose ends I might have missed in this short post. If you need help or more information about the secret combination of removing the door panel you can drop a note in the comments area and I will do my best to respond.